이전에 작성한 글에 이어서 ArgoCD 운영을 염두에 둔 기능들을 테스트해보았다.
- Autopilot 기능
- Github SSO 연동
ArgoCD 실습환경
이전과 동일하게 Windows 11의 WSL2를 통해서 Ubuntu 24.04를 실행하고 Kind를 통해서 구성하였다.
- Host : Windows 11
- WSL2 : Ubuntu 24.04
- kind / kubectl / git 설치
- GitHub Private Repo 사용
- Private Repository 접근 권한이 있는 GitHub Fine-grained PAT(Personal Access Token)
- 저장소 쓰기 권한까지 필요하다.
- ArgoCD는 Autopilot으로 설치하여, Argo CD 자체를 포함한 모든 인프라 구성을 GitOps 방식으로 관리한다
Kind 구성
Host 80,443 포트를 Kind 노드의 30080,30443(NodePort)과 미리 연결해 둔다.
kind create cluster --name ersia --image kindest/node:v1.32.8 --config - <<EOF
kind: Cluster
apiVersion: kind.x-k8s.io/v1alpha4
nodes:
- role: control-plane
  extraPortMappings:
  - containerPort: 30080   # NodePort 30080 → Host 80
    hostPort: 80
    protocol: TCP
  - containerPort: 30443   # NodePort 30443 → Host 443
    hostPort: 443
    protocol: TCP
EOF생성한 클러스터 확인
(⎈|kind-ersia:N/A) root@DESKTOP-O4EPQ9T:~/argocd-test# kubectl cluster-info --context kind-ersia
Kubernetes control plane is running at https://127.0.0.1:37471
CoreDNS is running at https://127.0.0.1:37471/api/v1/namespaces/kube-system/services/kube-dns:dns/proxy

To further debug and diagnose cluster problems, use 'kubectl cluster-info dump'.또한 SSO연동을 위해서 C:\Windows\System32\drivers\etc\hosts 열어서 아래 한 줄을 추가한다.
(SSO 연동 시 argocd 서버가 접속할 수 있는 url로 던져야하기 때문에 url을 아래와 같이 통일해줬다.)
127.0.0.1 argocd-server
ArgoCD Autopilot으로 GitOps 부트스트랩
ArgoCD의 Autopilot 기능은 ArgoCD가 자기 자신을 GitOps로 관리하게 하는 기능이다.
- ArgoCD를 클러스터에 설치하고
- 설치에 사용된 ArgoCD 매니페스트를 Git 저장소에 커밋
- 그 Git 저장소 안의 bootstrap/ 디렉터리 아래에 ArgoCD 자기 자신을 관리하는 Application 을 생성
→ ArgoCD가 자기 자신을 GitOps로 관리하게 된다. - 이후 생성하는 Project / Application들도 모두 Git에 커밋 후 ArgoCD가 자동으로 동기화한다.
argoproj-labs/argocd-autopilot: Argo-CD Autopilot
ArgoCD Autopilot 설치
cd ~
# 2025.11.14 기준 최신 버전
# https://github.com/argoproj-labs/argocd-autopilot/releases
AUTOPILOT_VERSION=v0.4.20

curl -L --output - \
  https://github.com/argoproj-labs/argocd-autopilot/releases/download/${AUTOPILOT_VERSION}/argocd-autopilot-linux-amd64.tar.gz \
  | tar zx

sudo mv ./argocd-autopilot-* /usr/local/bin/argocd-autopilot

(⎈|kind-ersia:N/A) root@DESKTOP-O4EPQ9T:~# argocd-autopilot version
v0.4.20# Windows 사용자의 경우 choco 명령어를 통해 설치할 수도 있지만
# chocolatey에서 관리되는 버전이 낮아서 추천하진 않음
# 아래의 경로를 통해 다운로드 받고 다운받은 경로를 Path에 등록해준다.
curl -OL https://github.com/argoproj-labs/argocd-autopilot/releases/download/v0.4.20/argocd-autopilot-windows-amd64.tar.gz
tar xvfz .\argocd-autopilot-windows-amd64.tar.gz
move .\argocd-autopilot-windows-amd64.exe .\argocd-autopilot.exe
# 사용자 Path로 등록
$oldpath = [System.Environment]::GetEnvironmentVariable("Path", "User")
$newpath = "$oldpath;C:\Users\user\Downloads"
[System.Environment]::SetEnvironmentVariable("Path", $newpath, [System.EnvironmentVariableTarget]::User)
PS C:\Users\user> argocd-autopilot version
v0.4.20Autopilot으로 ArgoCD 설치
Autopilot CLI를 통해 부트스트랩을 수행하면 자동으로 아래 작업을 수행해준다.
- Argo CD 설치
- GitOps Repo 구조 생성
- 자동 커밋 + 자동 푸시
# GitHub Fine-grained PAT
export GIT_TOKEN='<Token>'

# GitOps Private 저장소 URL
export GIT_REPO='https://github.com/<YOUR_ID>/<Repo_Name>.git'

# autopilot 실행
argocd-autopilot repo bootstrap

(⎈|kind-ersia:N/A) root@DESKTOP-O4EPQ9T:~# argocd-autopilot repo bootstrap
INFO cloning repo: https://github.com/ErsiaJin/argocd-test.git
Enumerating objects: 2, done.
Counting objects: 100% (2/2), done.
Total 2 (delta 0), reused 2 (delta 0), pack-reused 0 (from 0)
WARNING --provider not specified, assuming provider from url: github
INFO using revision: "", installation path: ""
INFO using context: "kind-ersia", namespace: "argocd"
INFO applying bootstrap manifests to cluster...
namespace/argocd created
customresourcedefinition.apiextensions.k8s.io/applications.argoproj.io created
...
waiting for argo-cd to be ready..
...
INFO pushing bootstrap manifests to repo
WARNING --provider not specified, assuming provider from url: github
Resolving deltas: 100% (1/1), done.
INFO applying argo-cd bootstrap application
I1115 20:56:04.039550    4505 warnings.go:110] "Warning: metadata.finalizers: \"resources-finalizer.argocd.argoproj.io\": prefer a domain-qualified finalizer name including a path (/) to avoid accidental conflicts with other finalizer writers"
application.argoproj.io/autopilot-bootstrap created
INFO running argocd login to initialize argocd config
E1115 20:56:04.101279    4505 portforward.go:391] "Unhandled Error" err="error copying from remote stream to local connection: readfrom tcp4 127.0.0.1:46831->127.0.0.1:38438: write tcp4 127.0.0.1:46831->127.0.0.1:38438: write: broken pipe" logger="UnhandledError"
'admin:login' logged in successfully
Context 'autopilot' updated

INFO argocd initialized. password: ****************
INFO run:

kubectl port-forward -n argocd svc/argocd-server 8080:80argocd-autopilot repo bootstrap 명령은 다음을 자동으로 처리한다.
- argocd 네임스페이스에 ArgoCD 설치
- GitOps Repo에 apps/, projects/, bootstrap/ 등의 기본 디렉터리 생성
- 부트스트랩 manifests 커밋 및 push
- autopilot-bootstrap Application 생성(ArgoCD가 자기 자신을 GitOps로 관리)
부트스트랩 완료 후, CLI 로그 하단에 초기 admin 패스워드와 포트포워드 안내가 표시된다.
# github 저장소에 commit된 내용을 pull로 받아 확인해보면 아래와 같다.
.
├── apps
│   └── README.md
├── bootstrap
│   ├── argo-cd
│   │   └── kustomization.yaml
│   ├── argo-cd.yaml
│   ├── cluster-resources
│   │   ├── in-cluster
│   │   │   ├── README.md
│   │   │   └── argocd-ns.yaml
│   │   └── in-cluster.json
│   ├── cluster-resources.yaml
│   └── root.yaml
└── projects
└── README.md# 별도의 터미널 창에 port-forward 를 구성해 ArgoCD에 접속해본다.
(⎈|kind-ersia:N/A) root@DESKTOP-O4EPQ9T:~# kubectl port-forward -n argocd svc/argocd-server 8080:80
Forwarding from 127.0.0.1:8080 -> 8080
Forwarding from [::1]:8080 -> 8080Host PC에서 웹브라우저를 통해 https://argocd-server:8080 로 접속하고 ID/Password를 입력해 진입해보자
아래와 같이 ArgoCD 자기 자신도 Application으로 등록된 화면을 확인할 수 있다.

Argo CD 서버를 NodePort로 변경
포트포워드를 계속 켜놓기 귀찮기 때문에 https://argocd-server 로 접속할 수 있게 NodePort를 추가해준다.
# NodePort 패치 파일 생성
cat <<'EOF' > bootstrap/argo-cd/argocd-nodeport-svc.yaml
apiVersion: v1
kind: Service
metadata:
  name: argocd-nodeport
  namespace: argocd
spec:
  type: NodePort
  ports:
    - name: https
      port: 443
      targetPort: 8080
      nodePort: 30443
  selector:
    app.kubernetes.io/name: argocd-server
EOF

# Kustomization에 패치 등록
cat <<'EOF' > bootstrap/argo-cd/kustomization.yaml
apiVersion: kustomize.config.k8s.io/v1beta1
kind: Kustomization
namespace: argocd

resources:
  - github.com/argoproj-labs/argocd-autopilot/manifests/base?ref=v0.4.20
  - ./argocd-nodeport-svc.yaml
EOF

# Git Commit & Push
git add bootstrap/argo-cd/*
git commit -m "Expose argocd-server as NodePort 30443"
git push기본 동기화에 시간이 걸리기 때문에 포트포워드 경로로 진입해서 argocd app을 Refresh해준다.

동기화 후 포트포워드를 꺼도 https://argocd-server로 접속할 수 있다.
Autopilot으로 간단한 앱 배포 테스트
Github 저장소에 앱의 yaml 코드를 작성하고 배포해도 되지만 autopilot을 통해 앱을 배포할 수도 있다.
# 프로젝트 생성
argocd-autopilot project create infra

# 데모앱을 지정한 프로젝트에 배포
argocd-autopilot app create demo-app \
  --project infra \
  --app github.com/argoproj-labs/argocd-autopilot/examples/demo-app/ \
  --type kustomize \
  --dest-namespace default \
  --dest-server https://kubernetes.default.svc
GitHub SSO(Dex) 구성
ArgoCD에서 작업할 계정을 생성하고 권한을 분리하는 것도 가능하지만 SSO를 통해 다른 사이트의 인증을 통해 로그인할 수 있도록 구성할 수도 있다.
Dex는 인증 서버로 OAuth 2.0, OIDC, LDAP 같은 여러가지 인증 프로토콜을 지원하며, 다양한 인증 방법을 지원한다.
ArgoCD Helm 차트를 설치할 때 기본적으로 argocd-dex-server 이름으로 Dex가 배포되어있는 상태이다.
GitHub OAuth App 생성
GitHub → Settings → Developer Settings → OAuth Apps → New OAuth App 메뉴에서
SSO를 연결할 앱 정보를 등록하고 Client ID / Client Secret (Secret은 앱 등록 후 생성해야함)를 받는다.

Secret 정보 Patch
GitOps 저장소에 넣으면 안 되는 민감정보라 패치로 적용한다.
kubectl -n argocd patch secret argocd-secret \
  --type merge \
-p '{"stringData":{"dex.github.clientSecret":"<SECRET>"}}'argocd-cm Dex 설정을 GitOps로 추가
Dex용 argocd-cm 패치 파일 작성
cat << 'EOF' > bootstrap/argo-cd/argocd-cm-dex.config
connectors:
  - type: github
    id: github
    name: GitHub
    config:
      clientID: <GITHUB_CLIENT_ID>
      clientSecret: $dex.github.clientSecret
      orgs:
        - name: <YOUR_GITHUB_ORG_OR_USERNAME>
EOFkustomization.yaml 에 patches 추가
cat << 'EOF' > bootstrap/argo-cd/kustomization.yaml
apiVersion: kustomize.config.k8s.io/v1beta1
kind: Kustomization
namespace: argocd

resources:
  - github.com/argoproj-labs/argocd-autopilot/manifests/base?ref=v0.4.20
  - ./argocd-nodeport-svc.yaml

configMapGenerator:
  - behavior: merge
    name: argocd-cm
    literals:
      # Argo CD 외부 URL
      - url=https://argocd-server
    files:
      # dex.config 키에 argocd-cm-dex.config 파일 내용을 merge
      - dex.config=argocd-cm-dex.config
EOFgithub 저장소에 반영한다.
# autopilot을 쓸 경우 remote와 local 커밋이력이 다를 수 있으므로 사전에 git pull을 수행
git pull

# Git Commit & Push
git status
git add bootstrap/argo-cd/kustomization.yaml \
        bootstrap/argo-cd/argocd-cm-dex.config

git commit -m "Patch argocd-cm with GitHub Dex config via configMapGenerator"
git pushArgoCD 웹화면에서 동기화를 수행한다.
다른 웹브라우저나 기존의 웹브라우저에서 ArgoCD 로그아웃 후 github 로그인 버튼 활성화를 확인한다.

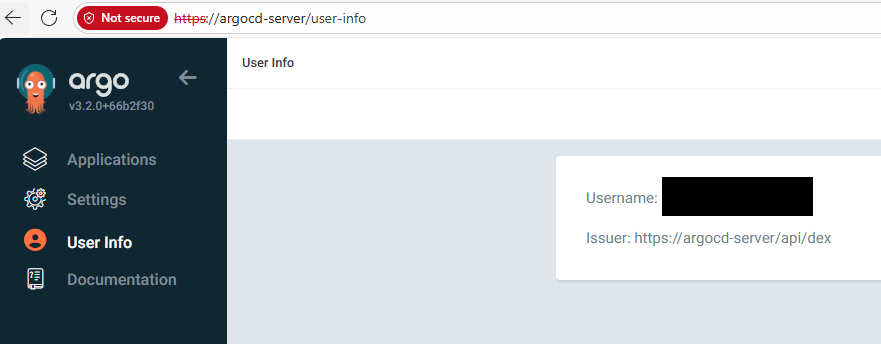
로그인 후 사용자 정보는 이와같이 github 계정의 ID로 나오게된다.
이번 글에서 작성하진 않았지만 Github 조직의 팀을 생성한 경우 더 다양한 RBAC을 제어할 수도 있다.